

Using Notion API
Notion connections let you connect your workspace to external tools and automate workflows through code. With the REST API, you can read, create, and update nearly everything in a workspace — pages, databases, users, comments, and more. When you create a connection, you define what it can do: which API endpoints it can call, what content it can read or write, and how it authenticates. Each connection gets its own credentials and its own set of permissions.What is a Notion connection?
A Notion connection — sometimes called an integration — connects your workspace to external apps and tools. That could be a SaaS product, an automation script, or a custom tool you’ve built. Connections are added to Notion workspaces and require explicit permission from users to access Notion pages and databases.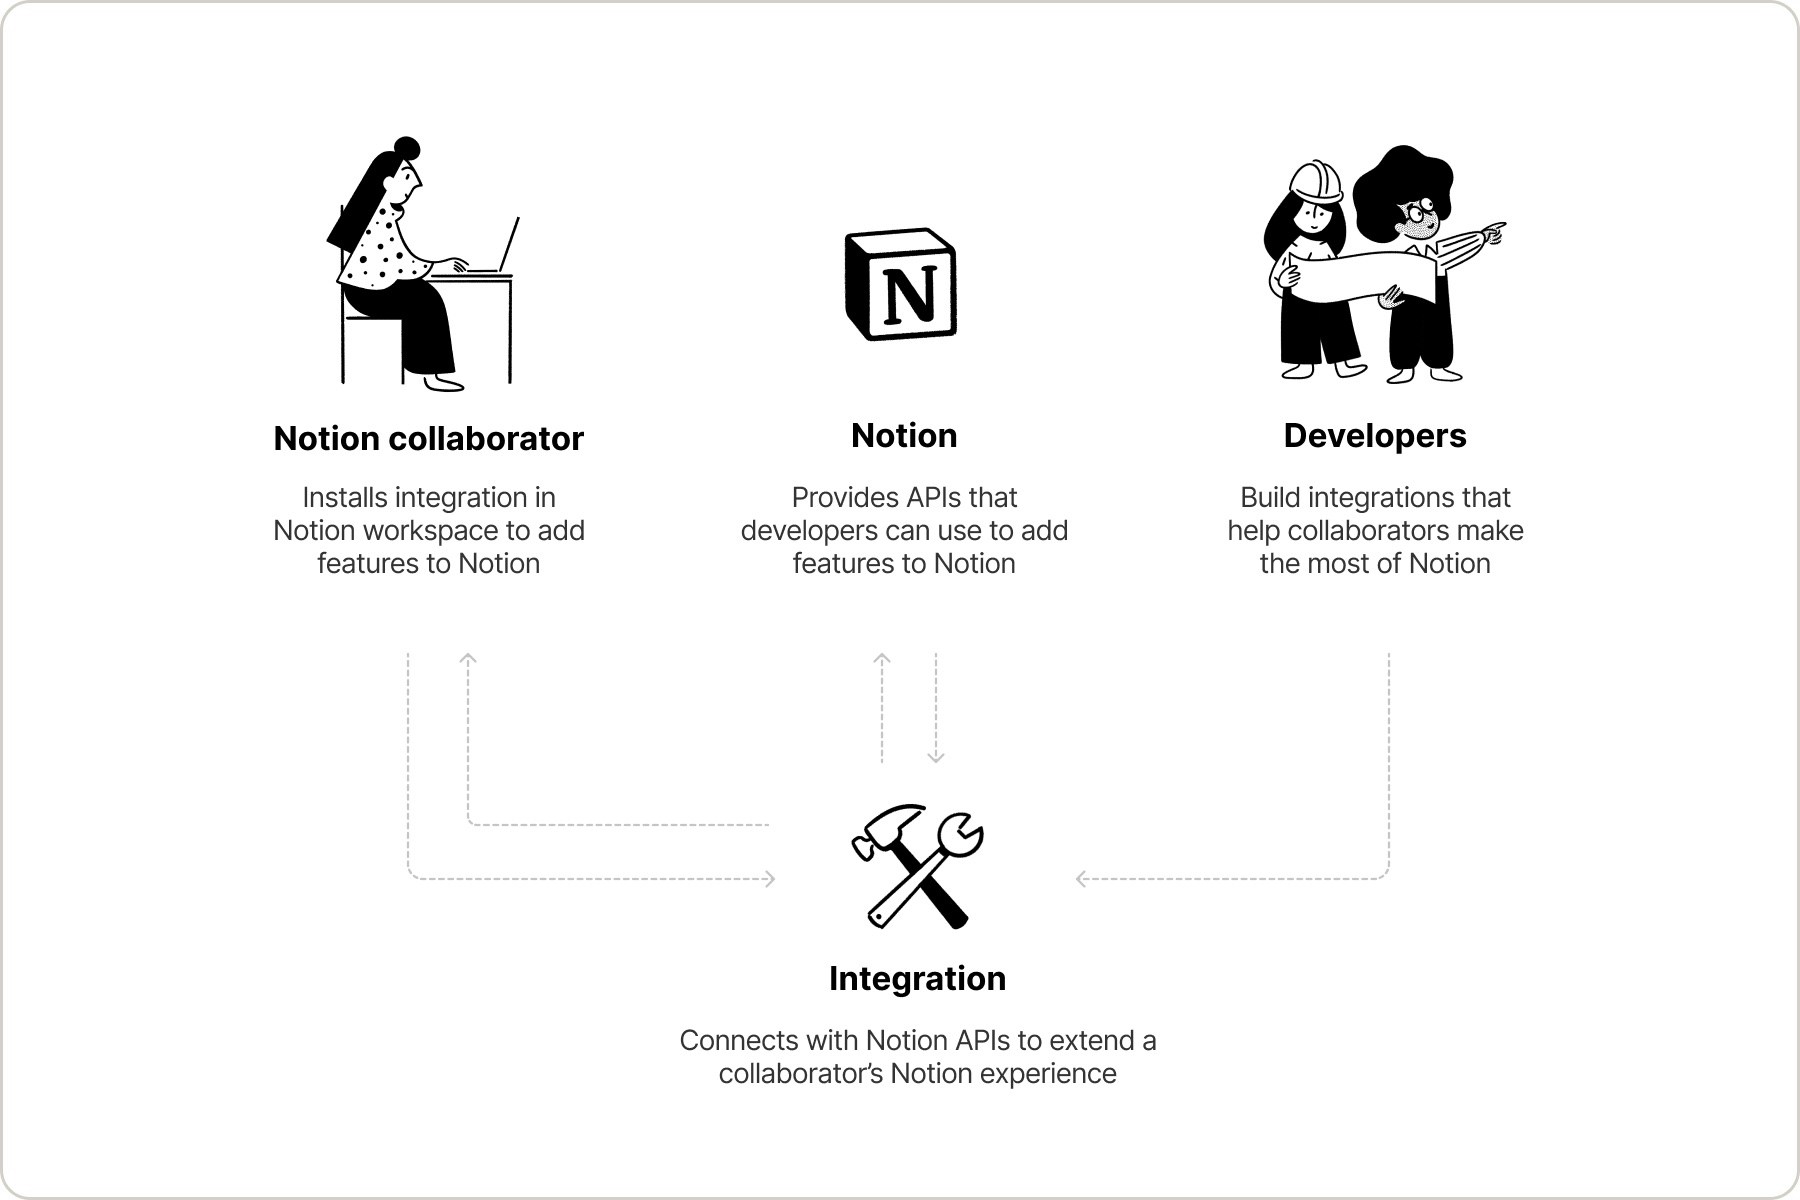
Create Notion connections that unlock new possibilities for teams.
Connection types
Notion supports three authentication models:- Internal connections are scoped to a single workspace and use a static credential called an internal connection API token. They’re ideal for custom automations and workflows — things like syncing data, sending notifications, or building internal dashboards.
- Public connections use OAuth 2.0 for authentication. At creation time, you choose their installation scope: Any workspace (any Notion user can install; Marketplace-eligible) or Selected workspaces only (restricted to workspaces you select; not Marketplace-eligible).
- Personal access tokens (PATs) are user-scoped tokens for scripts, CLI workflows, Workers, and tools that should act as one Notion user. A PAT uses the creator’s workspace membership and page permissions. See Personal access tokens.
Public connections must undergo a Notion security review before being listed on the Marketplace. You can create and use a public connection without listing it.
Comparison
Looking for SCIM or SAML SSO?Enterprise identity management (user provisioning, group management, and Single Sign-On) is covered in Notion’s Help Center, not in these API docs.

Provision users and groups with SCIM
SAML SSO configuration
Shared concepts
All connection and token types share a few core concepts.Capabilities
Every connection or token has a set of capabilities that control what it can do — read content, update content, insert content, read comments, and more. You configure capabilities when you create a connection or PAT. See the Capabilities reference for the full list.
Pages
Create, update, and retrieve page content.

Databases
Manage database, properties, entries, and schemas.

Views
Create and configure database views programmatically.

Data sources
Manage data sources, properties, entries, and schemas.

File uploads
Upload and attach files to pages and databases.

Comments
Handle page and inline comments.

Content queries
Search through workspace content.

Users
Access user profiles and permissions.
Content access
Connections must have access to pages and databases before they can interact with them. The mechanism differs by type:- Internal connections can be granted access in two ways: the connection owner can add pages directly from the Content access tab in the Developer portal, or workspace members can share pages via the Add connections menu in Notion.
- Public connections use the OAuth page picker, where users select which pages to grant access to during the authorization flow.
- Personal access tokens use the token creator’s existing Notion permissions. If the creator can access a page in Notion, a PAT with the right capabilities can access it through the API.
Webhooks
Connections can subscribe to real-time events — like page updates, property changes, and new comments — via webhooks. This allows your connection to react to changes in Notion without polling the API. See the Webhooks guide for details on setting up webhook subscriptions.Getting started
The fastest way to start building is the Quickstart — create a personal access token, make your first API request, and see a new page appear in your workspace in under two minutes. Once you’re ready to build further, choose the authentication model that fits your use case:1
Personal access tokens — Authenticate as yourself for scripts, CLI workflows, Workers, or trusted tools.
2
Internal connections — Build team-owned automations with a dedicated bot identity scoped to one workspace.
3
Public connections — Build apps for other Notion users with OAuth 2.0.
4
Authorization — Implement the OAuth 2.0 flow for public connections.
5
Secure API credentials — Secure and manage your API credentials in production.
6
Preparing for users — Set up databases, pages, and views automatically when users install your connection.
7
List on the Marketplace — Make your public connection discoverable to all Notion users.


